ioBroker Raspberry Pi OS Image Docs
This is the official documentation for the ioBroker Raspberry Pi OS image. It covers everything you need to set up your Raspberry Pi with the ioBroker Raspberry Pi OS image.
If you got any questions on how to configure your ioBroker and its adapters please refer to the Official ioBroker Docs.
Getting Started
Keep in mind that this is the recommended way to get the image up and running but definitely not the only one!
Things you need
Surprise, surprise, you need a Raspberry Pi.
Although it is possible to use a Pi 2 or 3, I would recommend you to use a Pi 4 with at least 2 GB of Memory (or even more).
Please make also sure to use a power supply that matches your Pi model and a SD card of 8GB or greater capacity.
To flash the image to your sd card I recommend using the officical Raspberry Pi Imager.
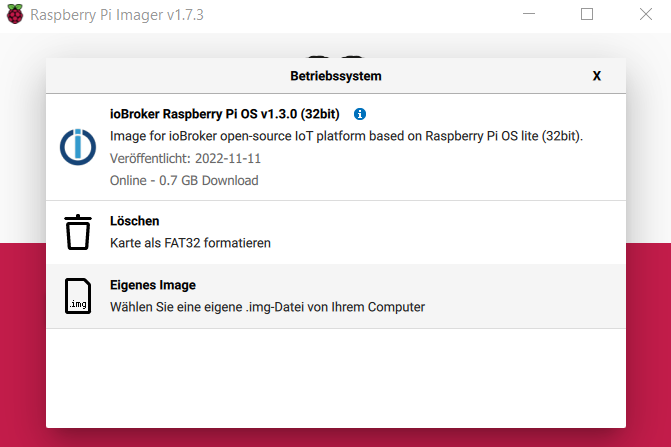
And last but not least you need the latest ioBroker Raspberry Pi OS Image zip file from the Github Repository's Releases page. It's on you if you want to download and select it or use the ioBroker Raspberry OS image repo with your Raspberry Pi Imager.
Flash the image
I really think there is no need to write down another full step by step guide on how to flash a Raspberry Pi os image to an sd card using the officical Raspberry Pi Imager. Let me instead just simply link this short Youtube video by @raspberrypi.
I hope thats enough input about how to flash the image.
Warning
There have been some security changes to the Raspberry Pi OS itself. So it is no longer possible to login with the user pi over SSH by default. To get this running simply use the advanced settings in Raspberry Pi Imager and set your own user and password. Otherwise you will need to logon on the console by using a display and keyboard and create your user according to this guide .
The following will give you some additional hints to maybe make flashing ioBroker Raspberry OS image a litte bit easier.
Use ioBroker Raspberry OS image repo
Although the ioBroker image is not yet added to the official Raspberry Pi OS Repo (Make sure to leave a thumbs up!) it is possible to directly install the ioBroker Raspberry Pi OS image without the need to download it separately. If your officical Raspberry Pi Imager is already installed, then simply run it with the following command:
Windows
"C:\Program Files (x86)\Raspberry Pi Imager\rpi-imager.exe" --repo https://docs.buanet.de/rpi-imager.json
Linux
rpi-imager --repo https://docs.buanet.de/rpi-imager.json
This will automatically use our ioBroker Raspberry OS image repo and let you simply select the image from the menu.
Pro Tip
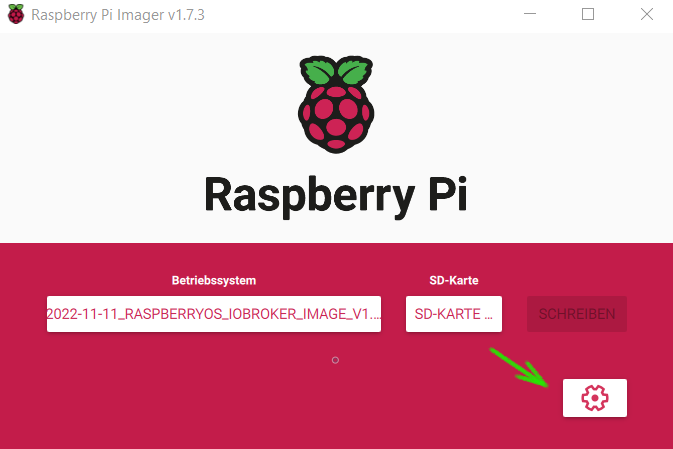
If you are missing the "advanced options" menu after you selected the ioBroker Raspberry OS image in you Raspberry Pi Imager, simply press CTRL + SHIFT + Xand it will show up.
Use advance settings
Recent versions of Raspberry Pi Imager support setting some advanced options like hostname, SSH access or language settings before flashing the image to an sd-card. In general you can access this settings menu by klicking the gear icon. If the icon doesn't show up press CTRL + SHIFT + X.
Access ioBroker
After flashing your sd card an putting it back into your Raspberry Pi, simply boot it up. In general there is no need to attach any input device (keyboard or mouse) or monitor. If you configured wireless LAN (advanced settings) your Pi will connect automatically. Otherwise use a LAN cable to connect it to your router. The first startup (including an automatic restart) will take some time. Then, if you kept the default settings, your ioBroker should be reachable by accessing http://[hostname or ip]:8080.
Pro Tip
If you don't know the ip address your Raspberry Pi got from your router, simply look it up in your routers web interface. Otherwise connect a monitor to your Pi. You will find the ip address at the login screen.
Default Image Settings
The image comes with some default settings. Some of them you can overwrite during flashing the image to your sd card, some are set to improve performance.
System
See the list of default system settings.
| parameter | default setting |
|---|---|
| hostname | iobroker-pi |
| SSH | aktiviert |
| partition | resized during first start |
| runlevel | 3 (without graphical ui) |
| memory split | 16 GB for GPU |
Users
Per default there are two users pre configured.
| username | password |
|---|---|
| pi | raspberry |
| iobroker | [not set] |
For managing your Raspberry Pi please make sure to always use the pi user or create a new one. Make also sure to change the default password by running passwd after your first logon.
The user iobroker is build for only running the ioBroker software. Therefore it is set up as a deamon user and by default not configured for any interactive logon.
Language and locales
The following language settings are set by default.
| parameter | default setting |
|---|---|
| locale | en_GB.UTF-8 |
| timezone | Europe/London |
| keyboard keymap | gb |
| keyboard layout | English (UK) |
Changing the default settings is possible before flashing the image (see advanced options) or by using the builtin "Raspberry Pi Software Configuration Tool". To start, login to the command line and run sudo raspi-config. For more information see the official Raspberry Pi Documentation.
⚠️ Work In Progress ⚠️
This documentation is still work in progress. If you got any improvements simply let me know by opening an issue or edit it by yourself and create a pull request.
If you got any unanswered questions please join the ioBroker community on Discord, Telegram, Facebook or ioBroker Forum.